
Making Miniature Porcelain
The first thing to do is to create a model. The original model can be a drawing, an existing object or a mockup sample. From this a mother mold will be made.
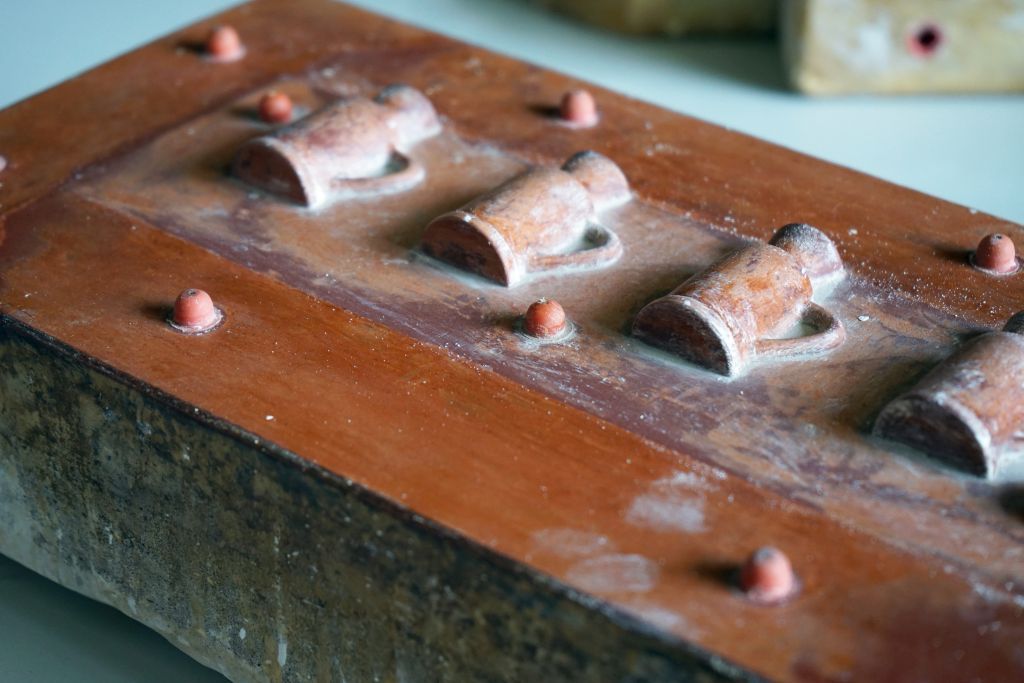
The mother mold is used for producing working molds by casting them with special plaster.
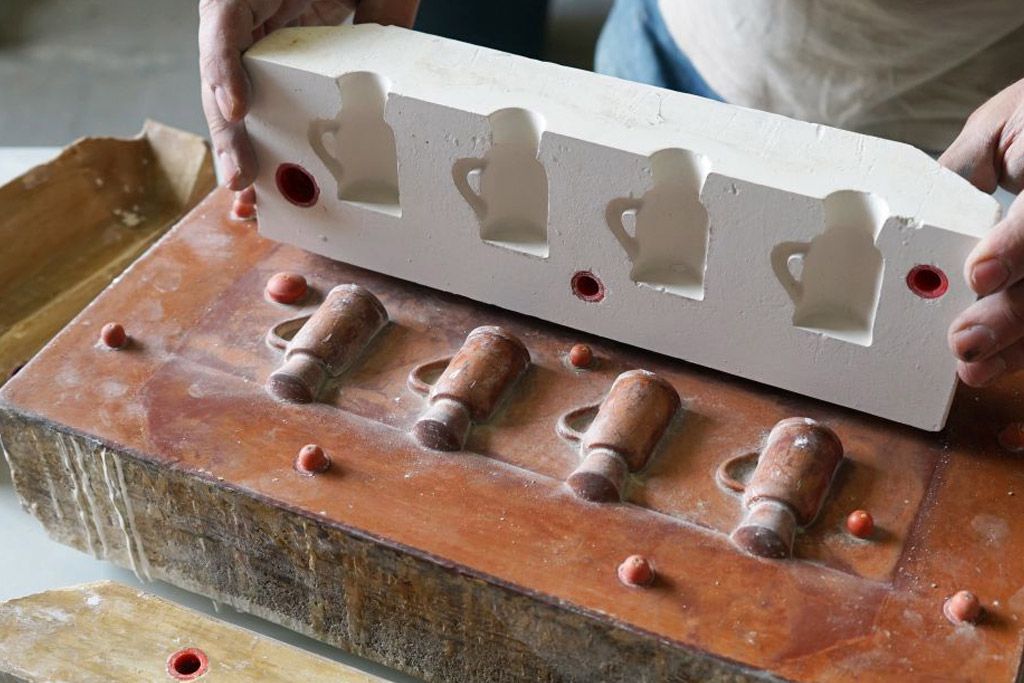
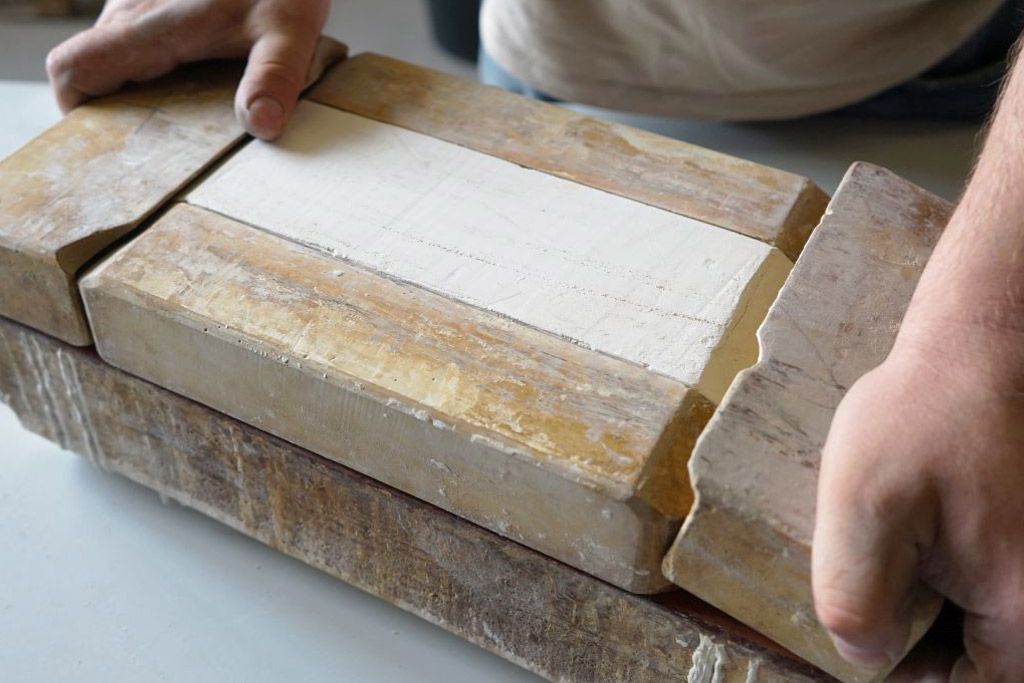
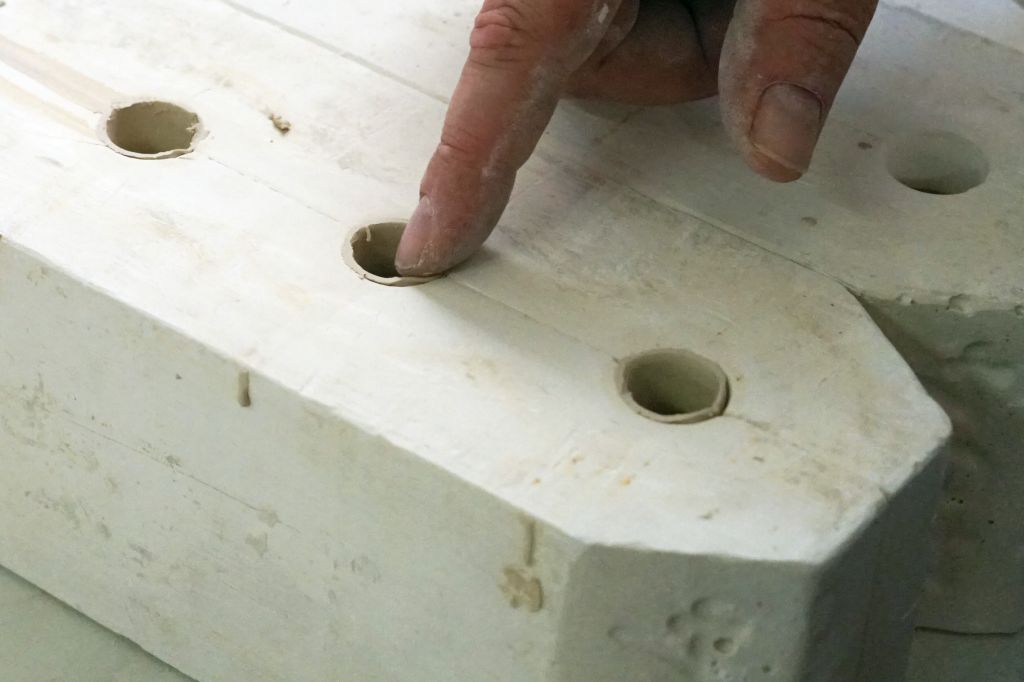
The white plaster working mold gets triggered out of the mother mold. This step has to be done with all parts of the mother mold which are needed to complete the item. In most cases there are two to four parts.
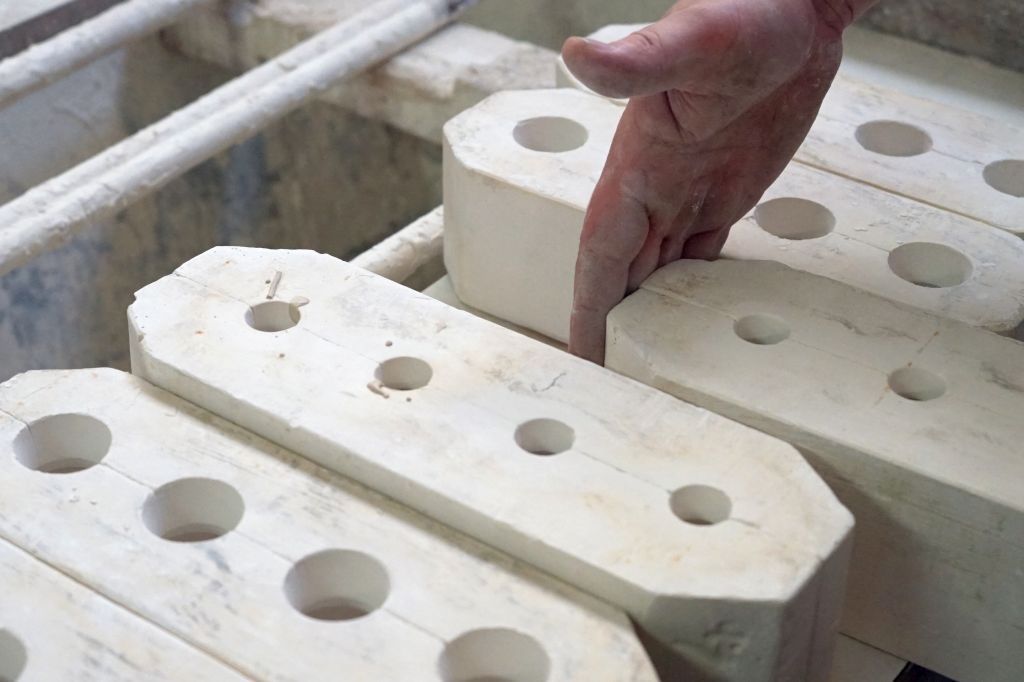
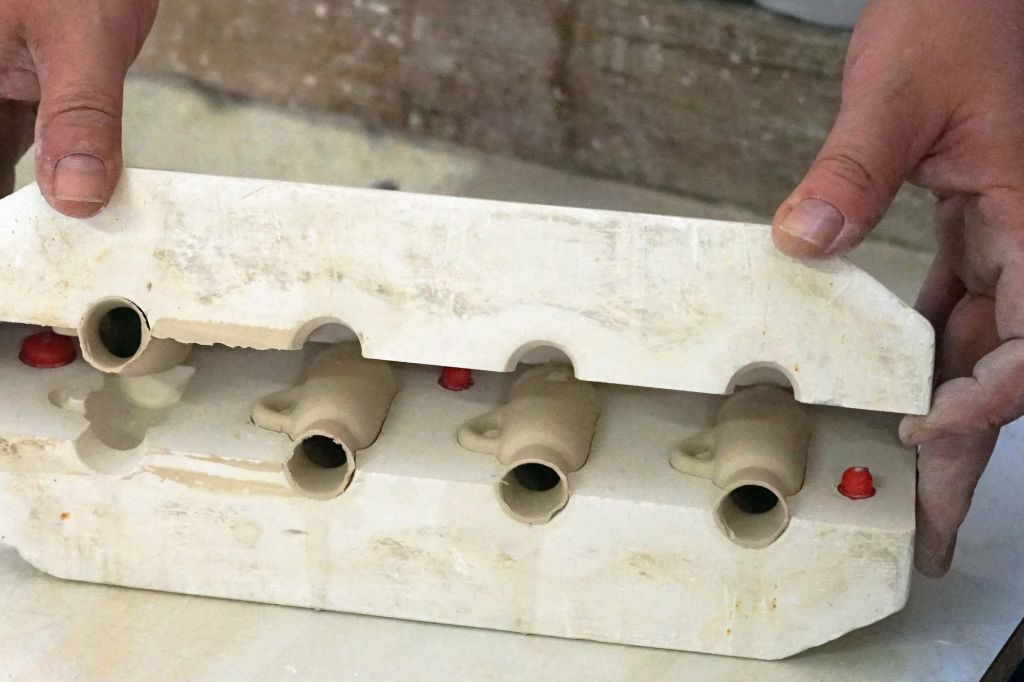
All the parts of the working molds will be put together. In our case there are two halves which are put together to build a cavity.
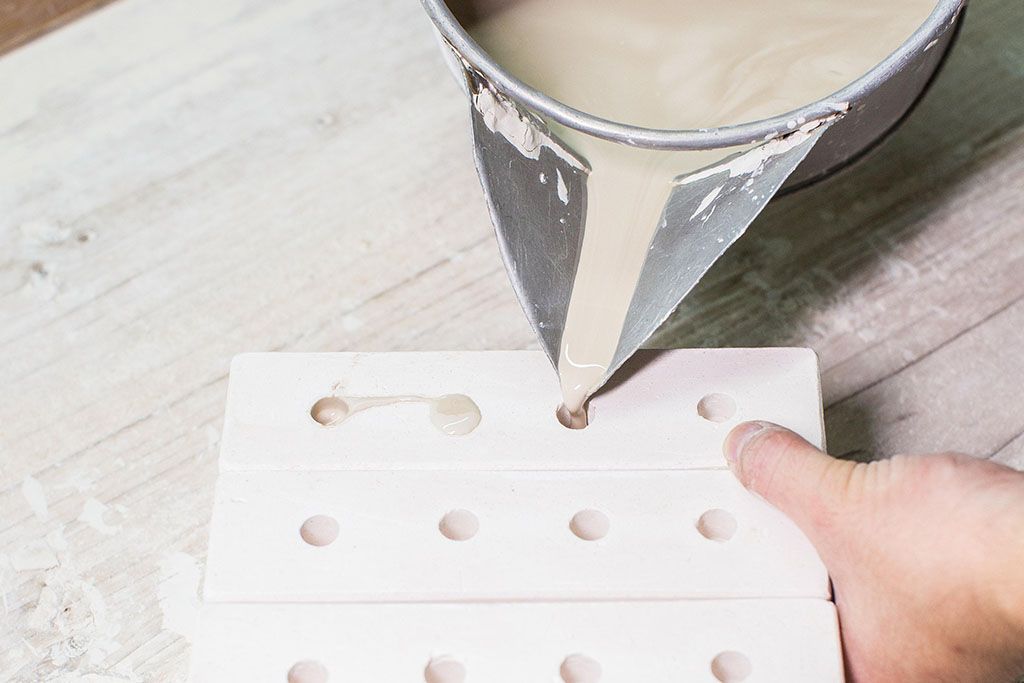
The liquid mass (mixture of kaolin, feldspar and quartz) will be poured into the molds.
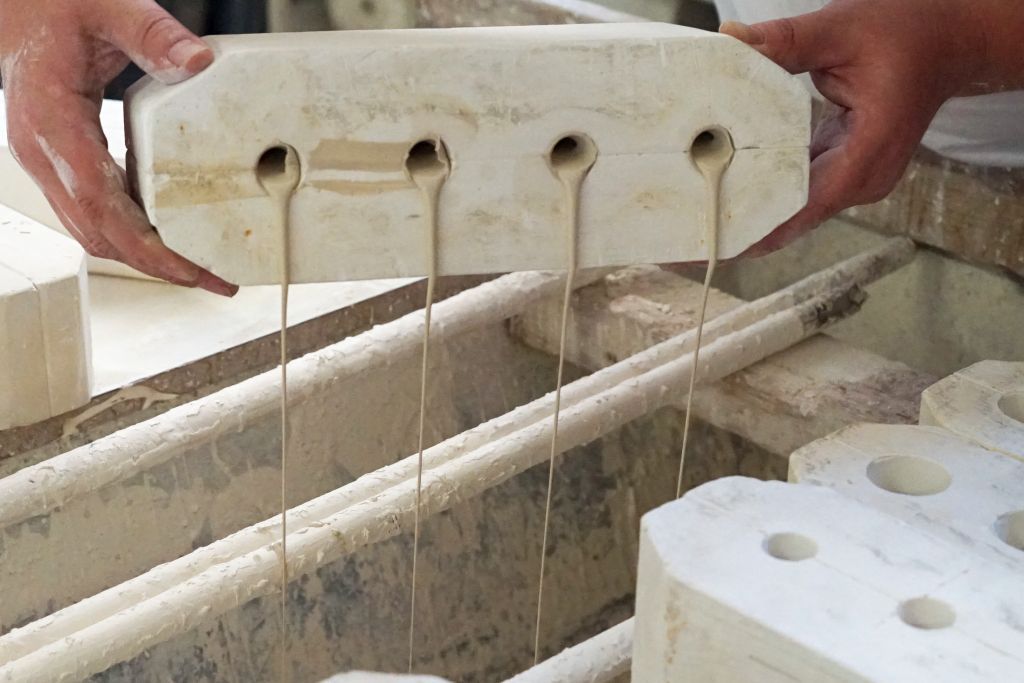
After 5 to 20 minutes, depending on the item, the mold will be turned around so that the surplus material can run out of it. The porcelain mass is drying on the inside wall of the plaster working mold during this time. The longer the mass is in the form, the thicker is the wall thickness of the porcelain later. If it´s a shorter time in the mold, the thickness is thinner.
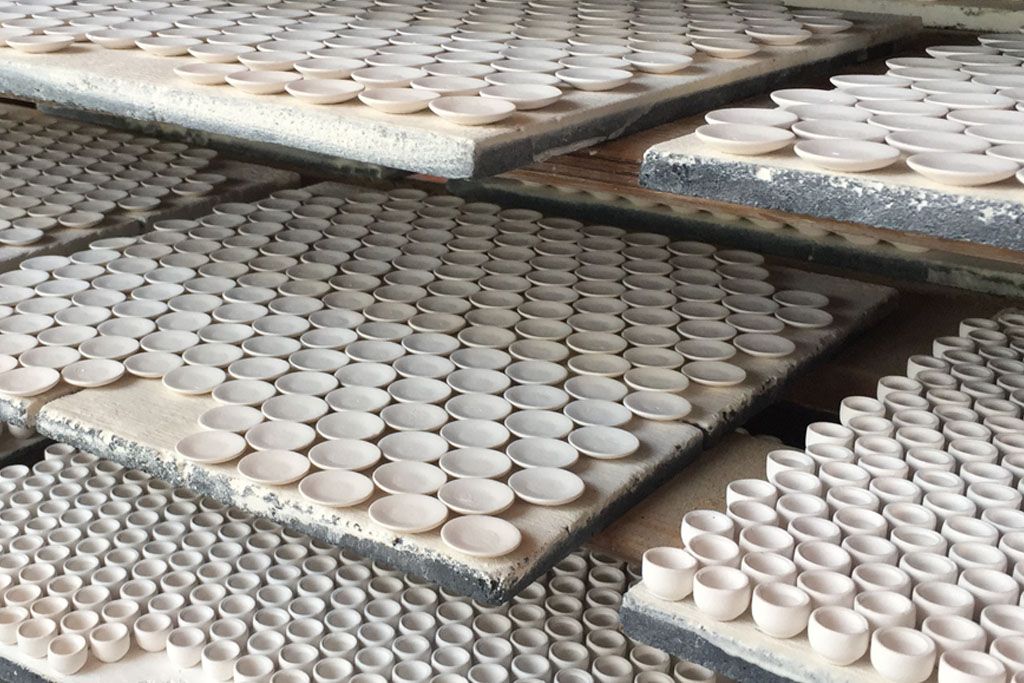
After one day in a drying room with a temperature of 50°C the porcelain forms are checked to see if they are dry enough to free them out of the mold. The porcelain forms shrinked because of the drying. Now they can be removed from the molds easily.
The working molds can be opened now.
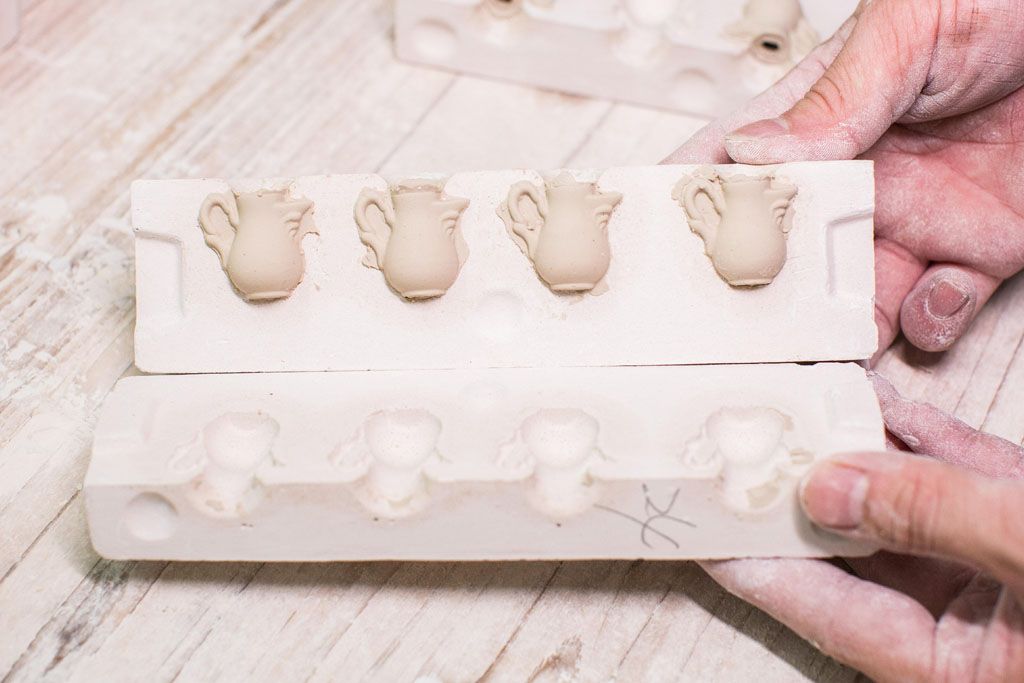
The results are miniature jugs.
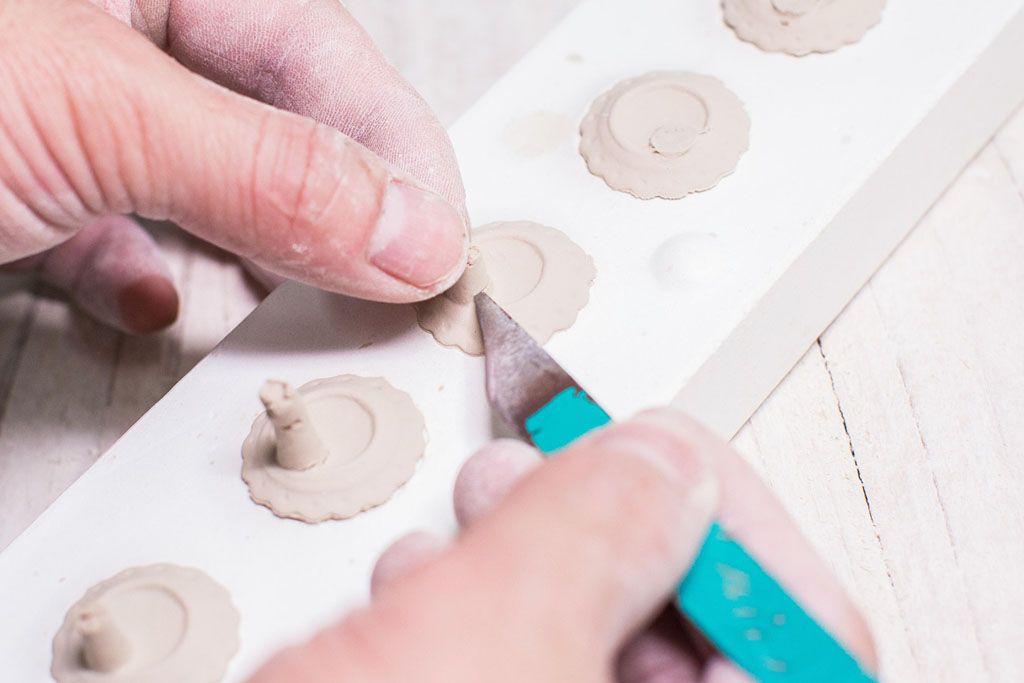
The excess, dried porcelain mass will be cut off. After that, the small molds are released from the working mold. This production process is particularly sensitive. Since the mass is still very soft, there is a big risk of deformation. Too much pressure with a finger and the porcelain form is destroyed, so this step in production is very sensitive.
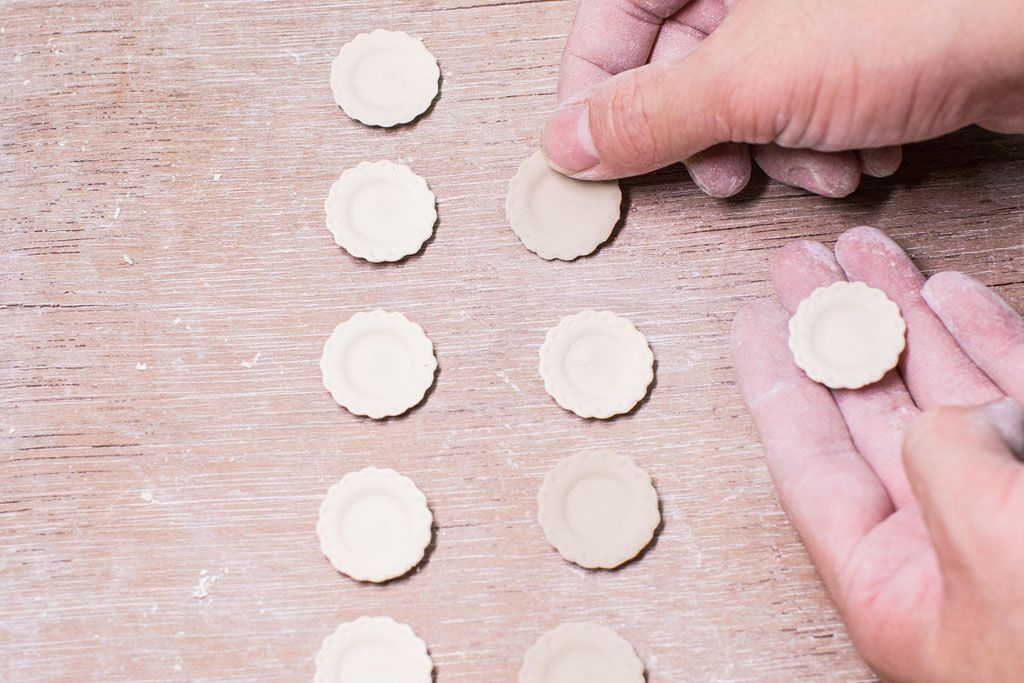
The porcelain bodies are still soft and wet, so they must dry at least for one day.
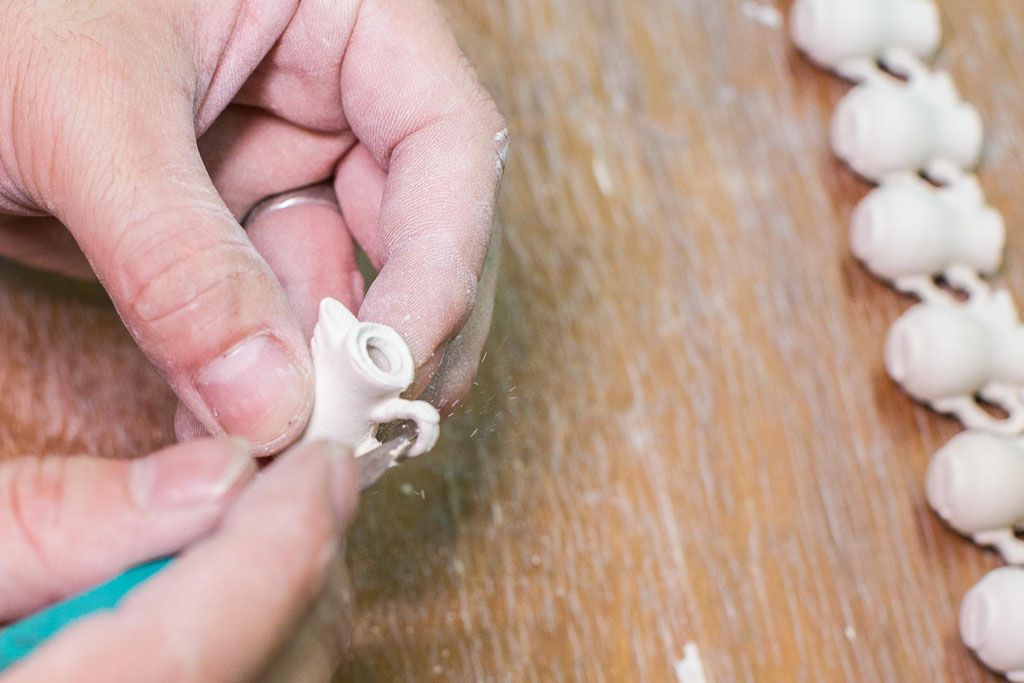
After this time the edges and rims can be cleaned by using a knife and a wet sponge.
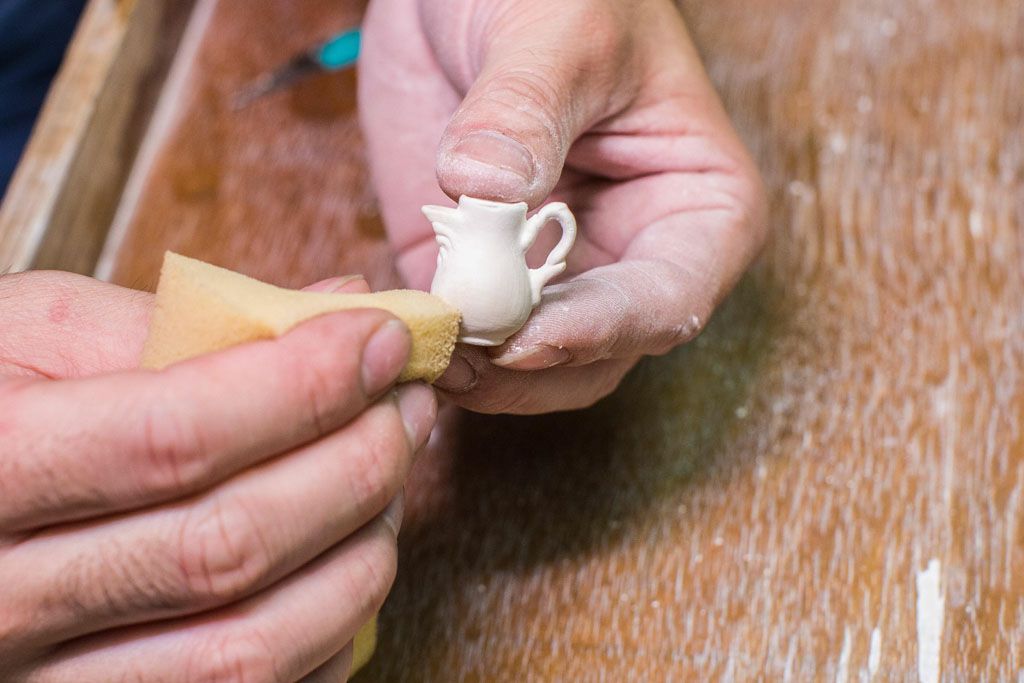
All remaining sharp edges, marks or scratches have to be washed off carefully with a very special natural sponge. This job has to be done very carefully and by an experienced operator.
Now it´s time for the first firing. This pre-firing is executed at 800°C. Because of this the pieces run dry. Now they can absorb the glaze perfectly. This pre-firing is essential for the quality of the production. After firing the pieces have to cool down, so they can be taken to the glazing process.
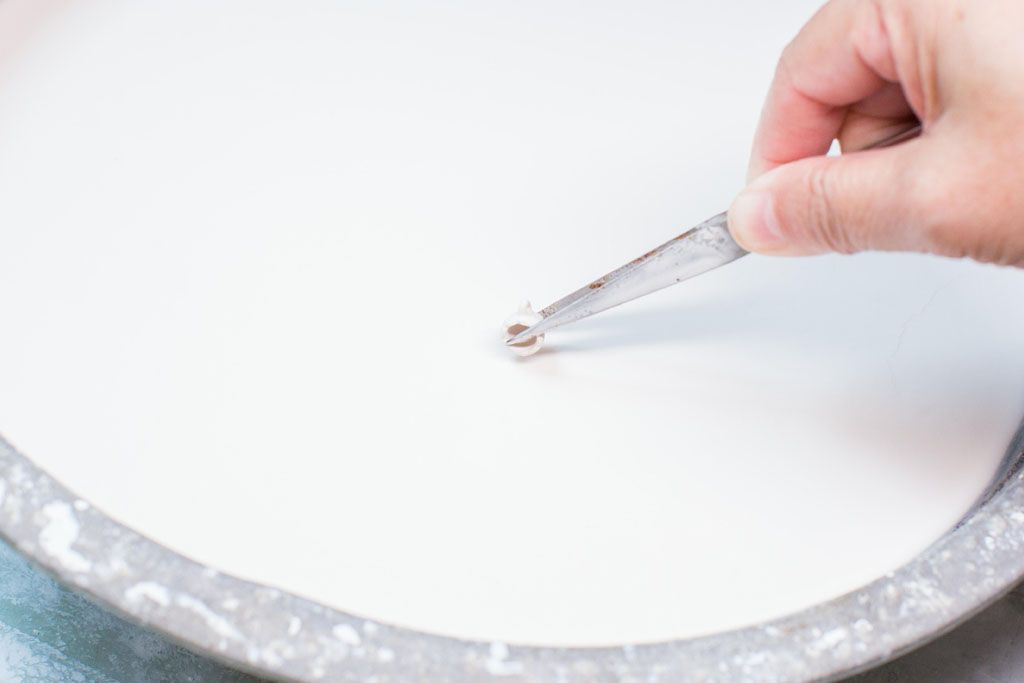
Our little porcelain pieces get dipped into the glaze with a pair of tweezers. The pieces have to be completely covered on the inside and the outside with the glaze.
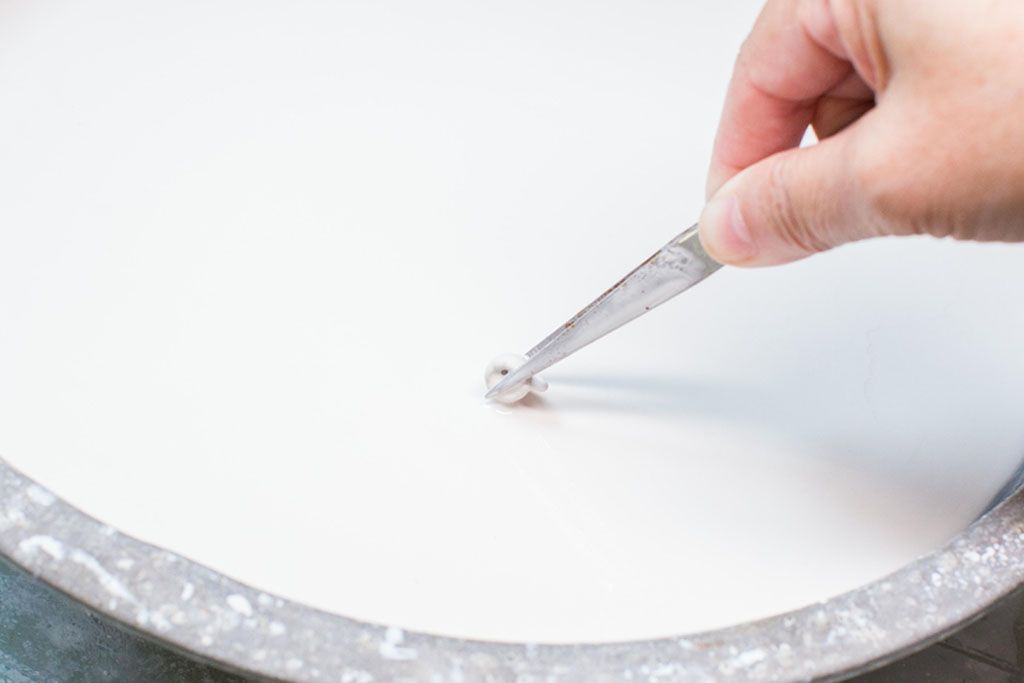
It´s very important that the glaze has the right mixture and texture. So the dry pieces can soak the glaze. Than they have to dry for at least one day.
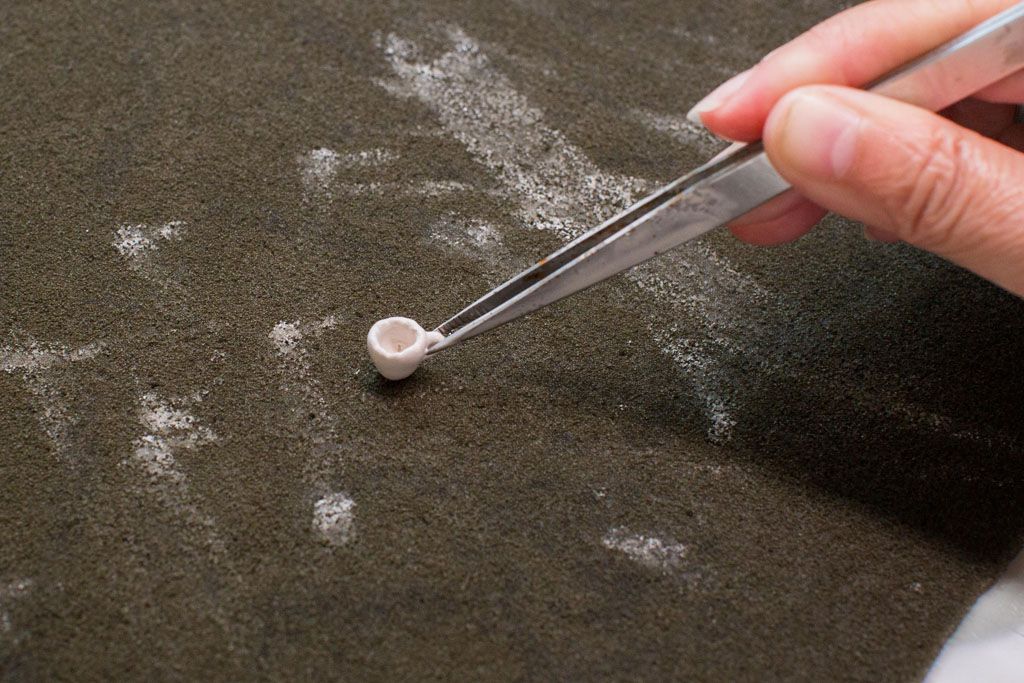
The glaze has to be rubbed off the bottom of the miniature. Otherwise the glaze would stick to the firing plates and both, the porcelain and the firing plates would be destroyed.

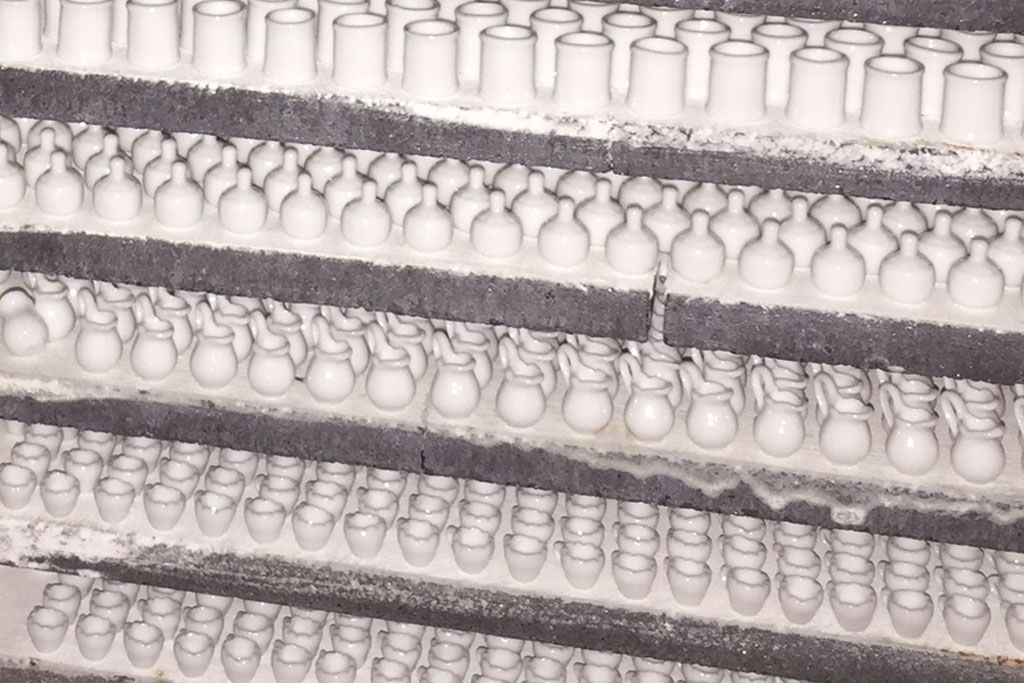
Now the parts can be fired. This firing is called glost firing and reaches temperatures of 1280 to 1360 degrees Celsius.
This is what the finished porcelain parts look like after glaze firing. The size difference to the unfired pieces is huge. As a result of the firing and the heat, the porcelain loses water and shrinks by around 16%. The difficulties to control the high temperatures lead to differences in the shrinking rate which is one of the biggest problems for making miniature porcelain. After firing, the porcelain has a beautiful shine and is very hard.
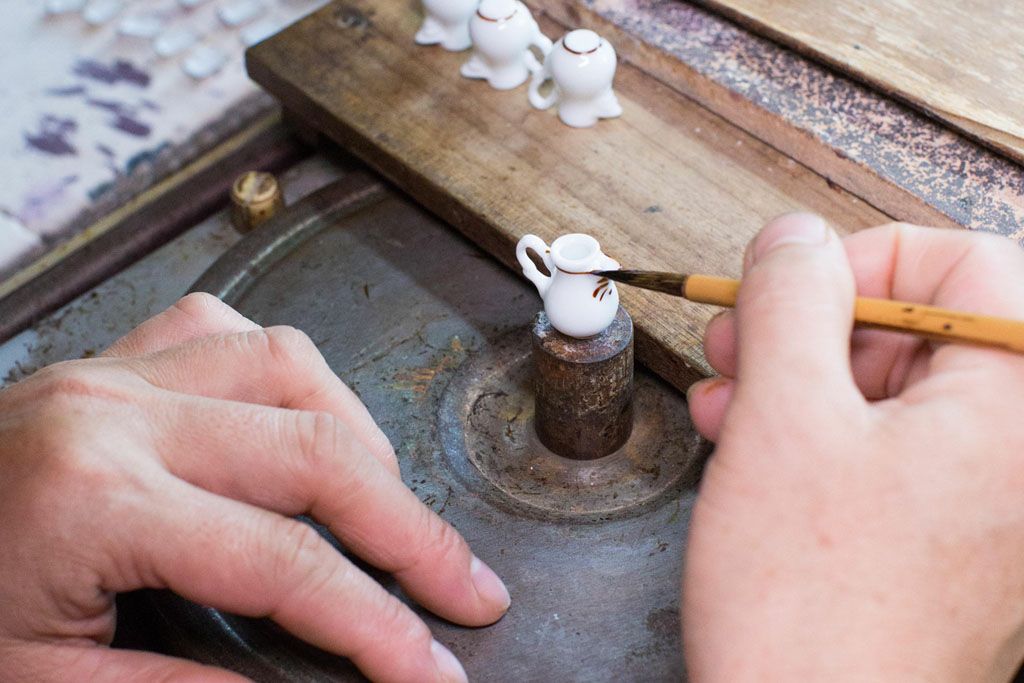
After the porcelain pieces have cooled down, they will be sent to the painting department. A turning table is used to put gold rims and other decorations on the porcelain piece. This requires a steady hand, lots experiences and training.
With another firing, the 24K gold is permanently fired on the porcelain part. During this process the gold colour will change to the real gold appearance and gets shiny.

After that, the porcelain parts are ready to receive their decor. To do this, a special, with ceramic colours printed decal, is used. In warm water the decal gets off from the printing paper and can be moved by hand onto the porcelain. To avoid defects, it´s necessary to dry it up by hand and push out the water underneath.
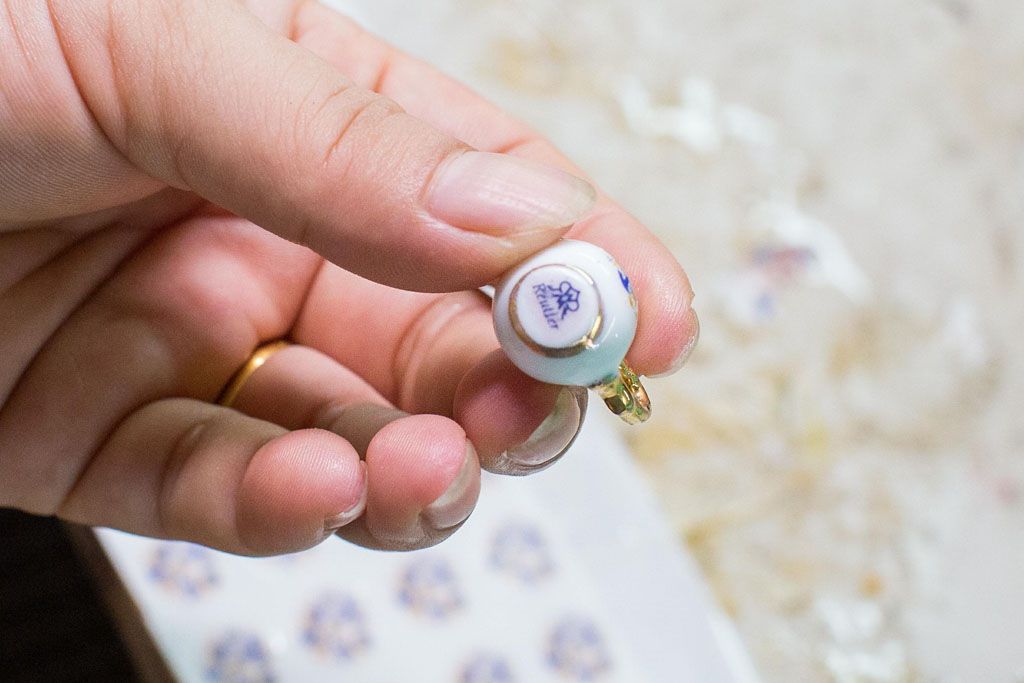
On the bottom of each of our porcelain pieces the “Reutter“ back stamp will be put.
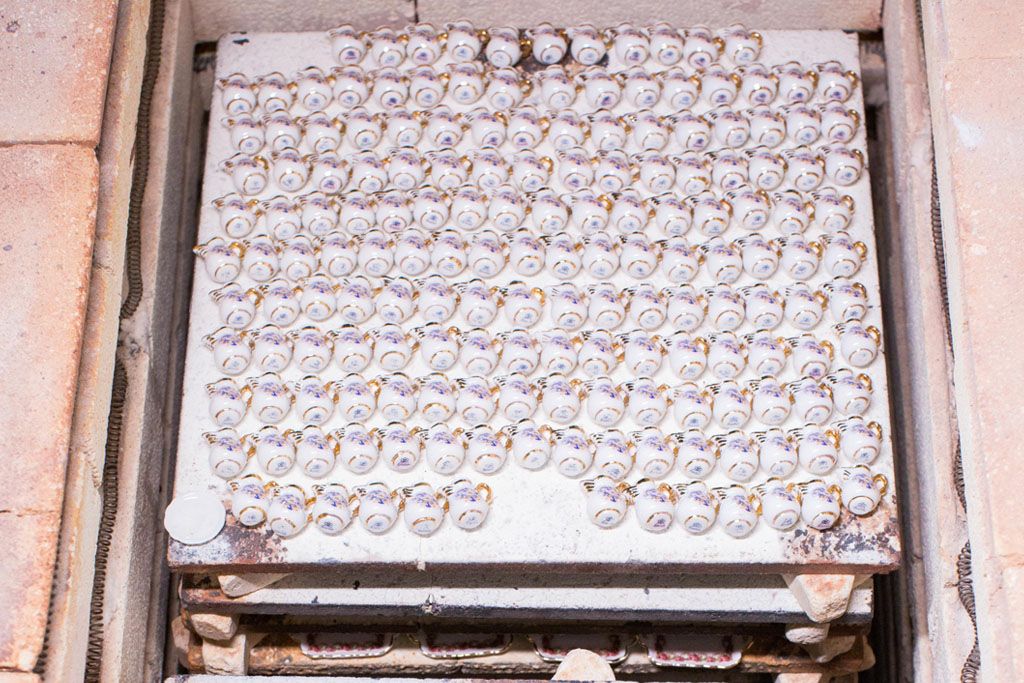
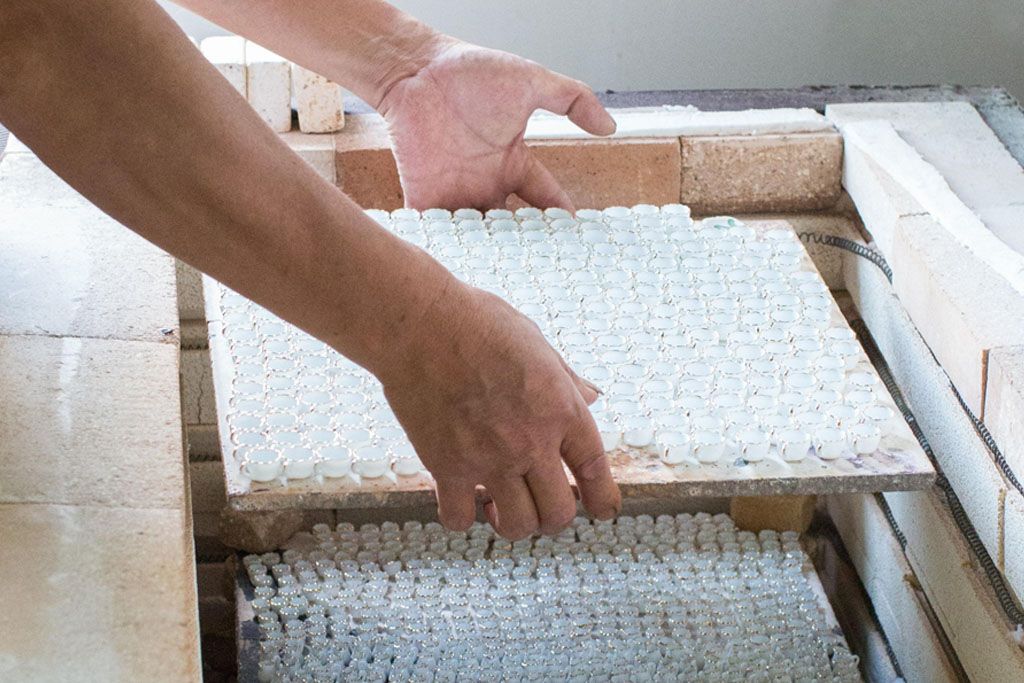
Again the pieces have to be dried before they can be fired a third time. Therefore, they need to be sorted and then placed on tiles of high-temperature steel. These tiles will be placed in a special kiln. At a temperature of about 805°C the decoration will be fired into the glaze of the porcelain which makes the decoration permanent.
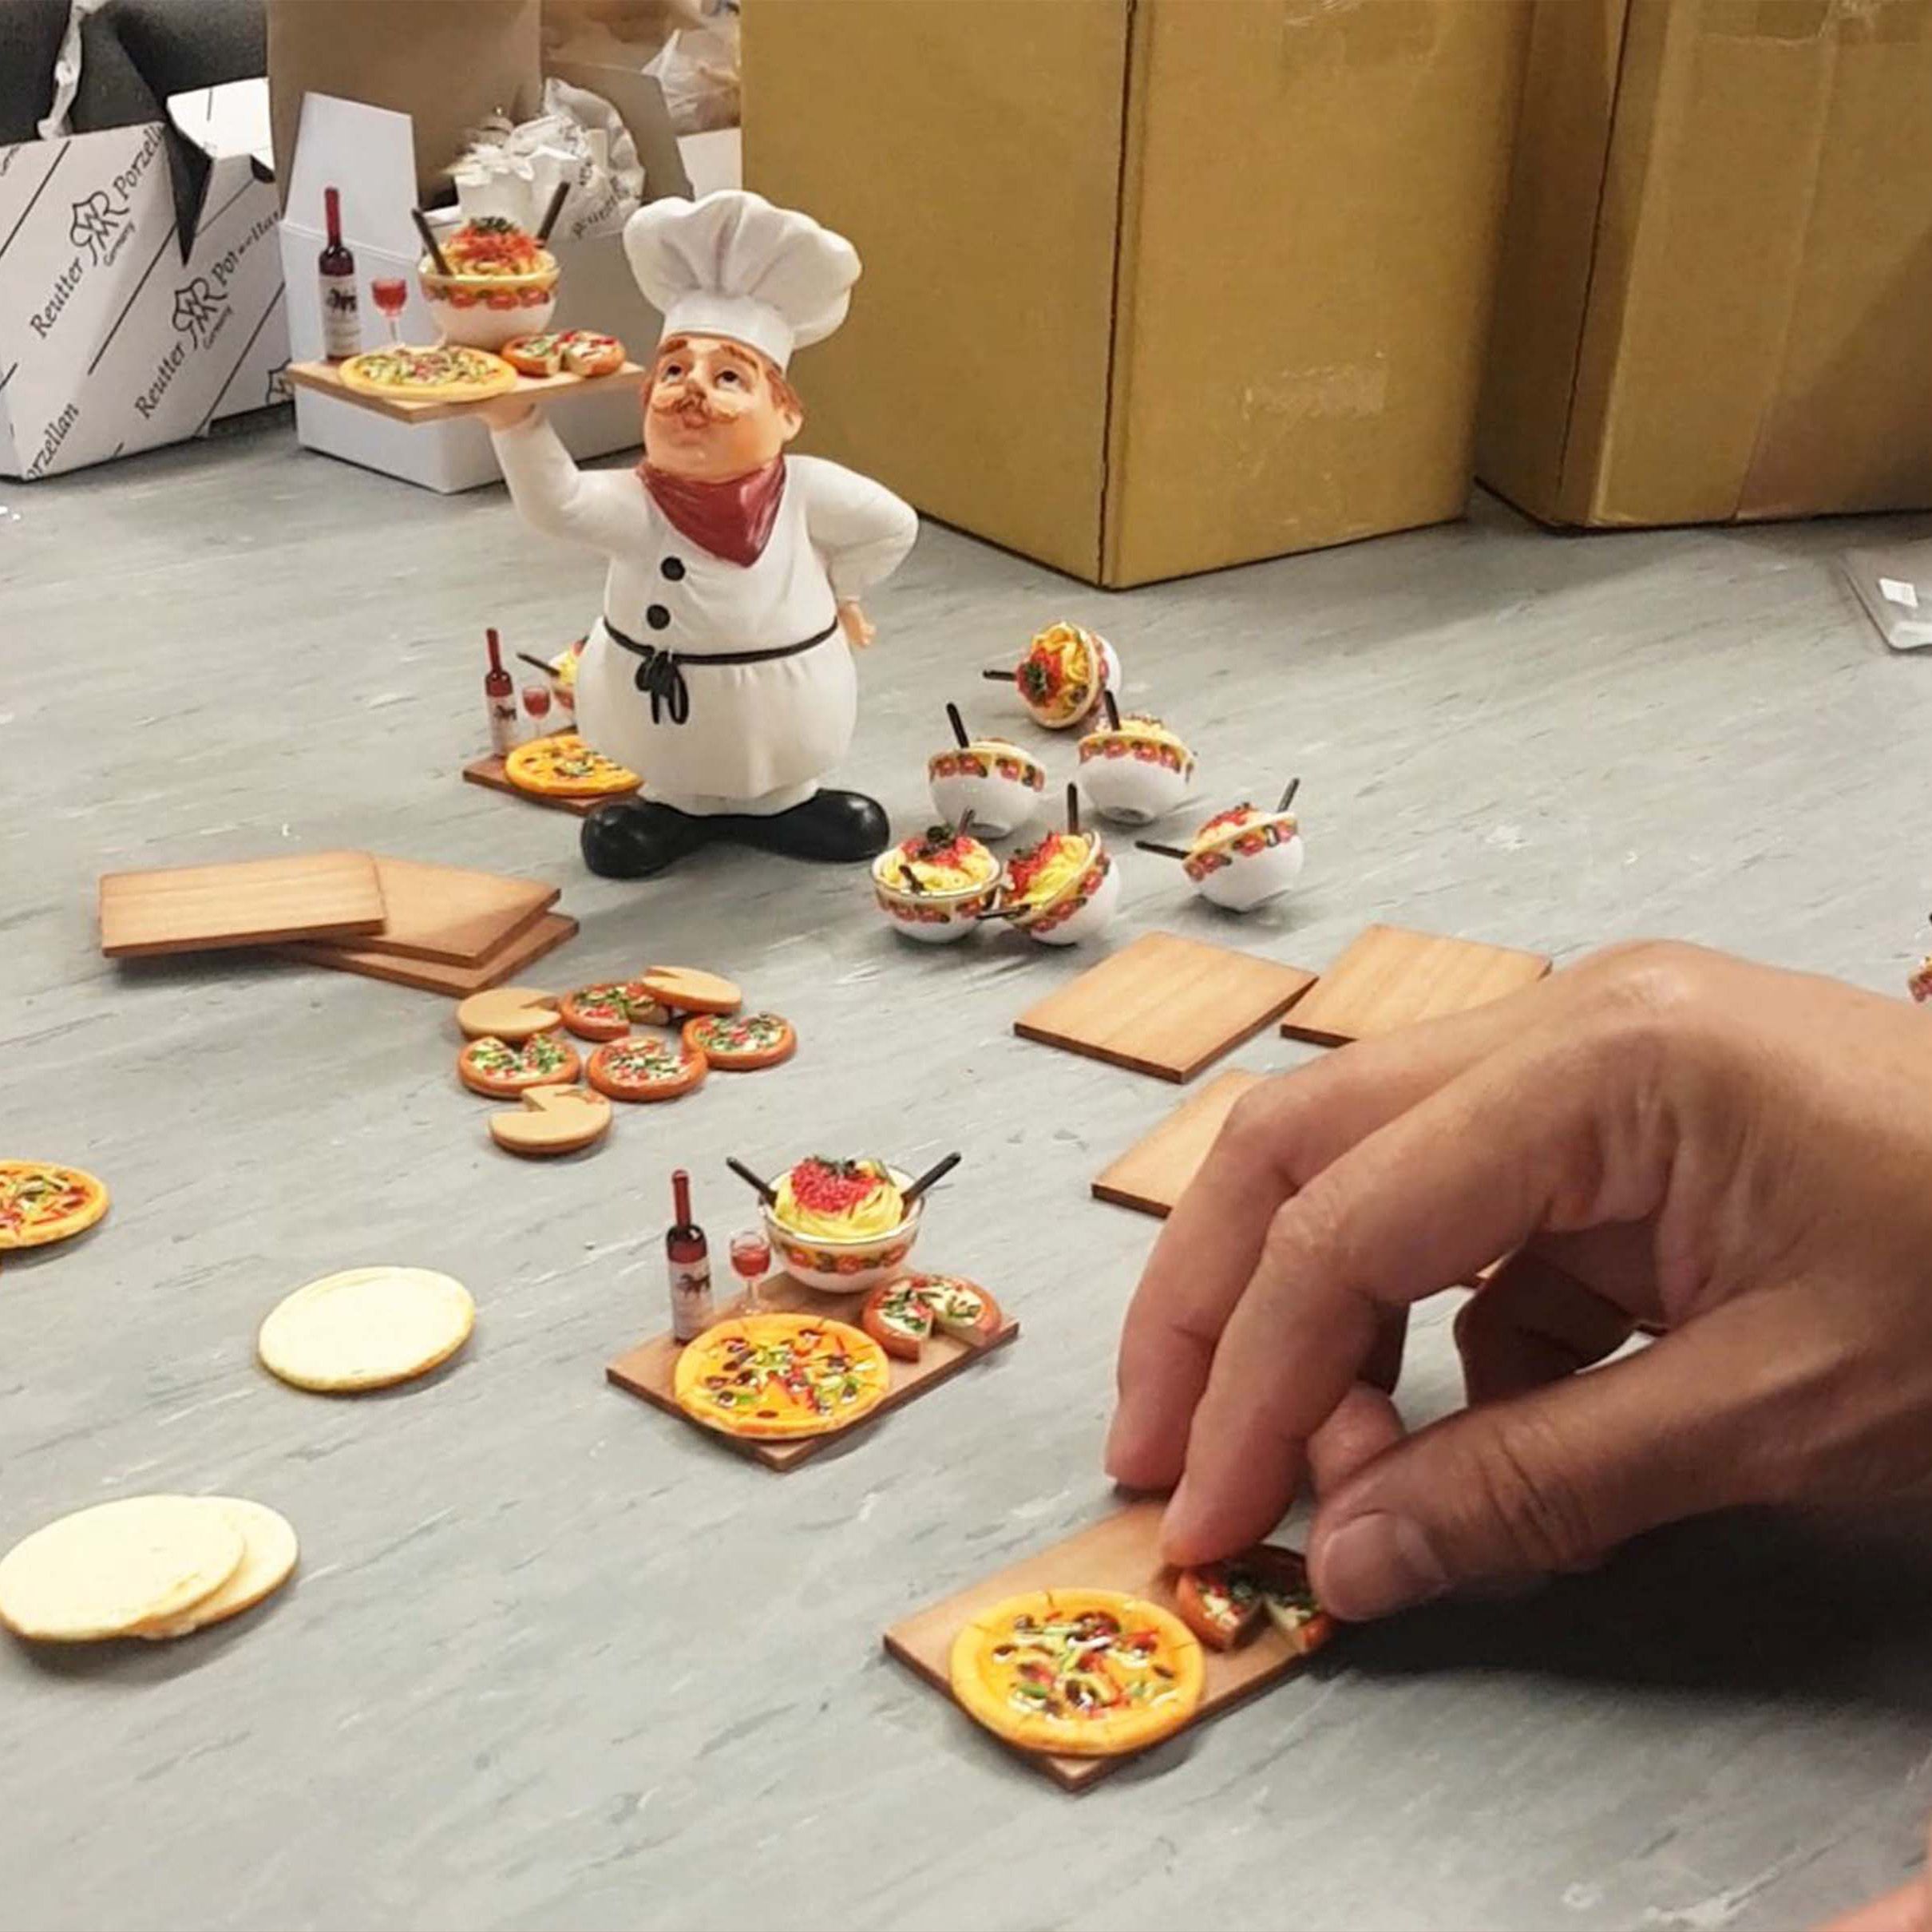
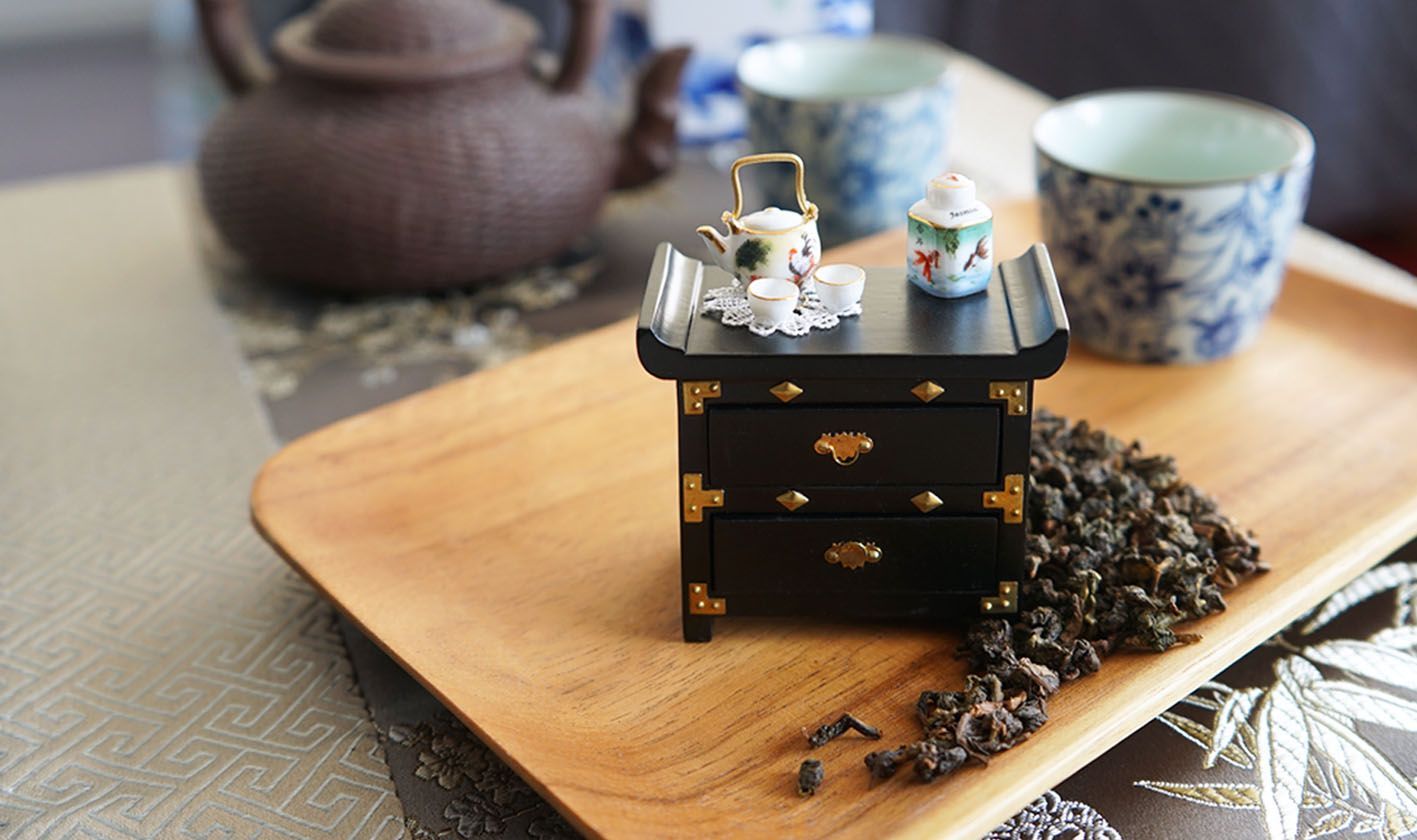
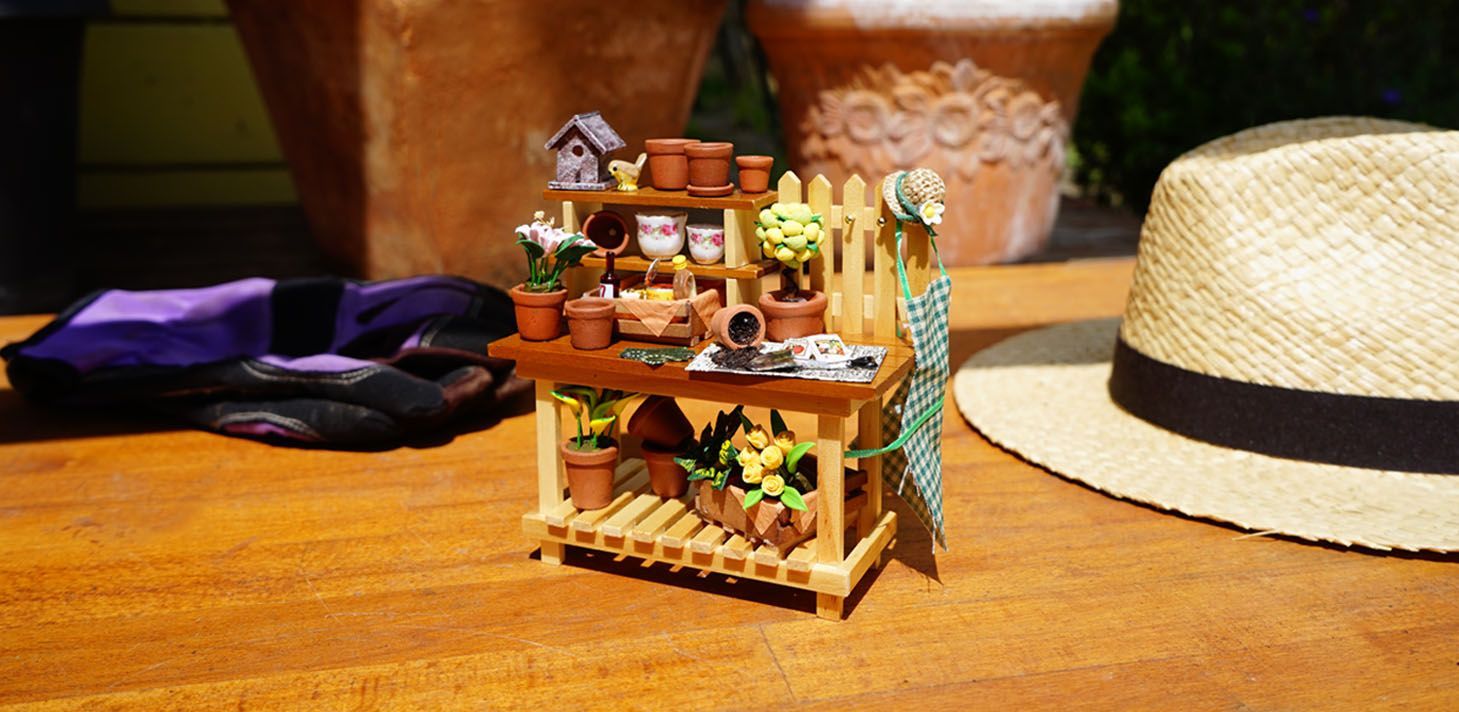
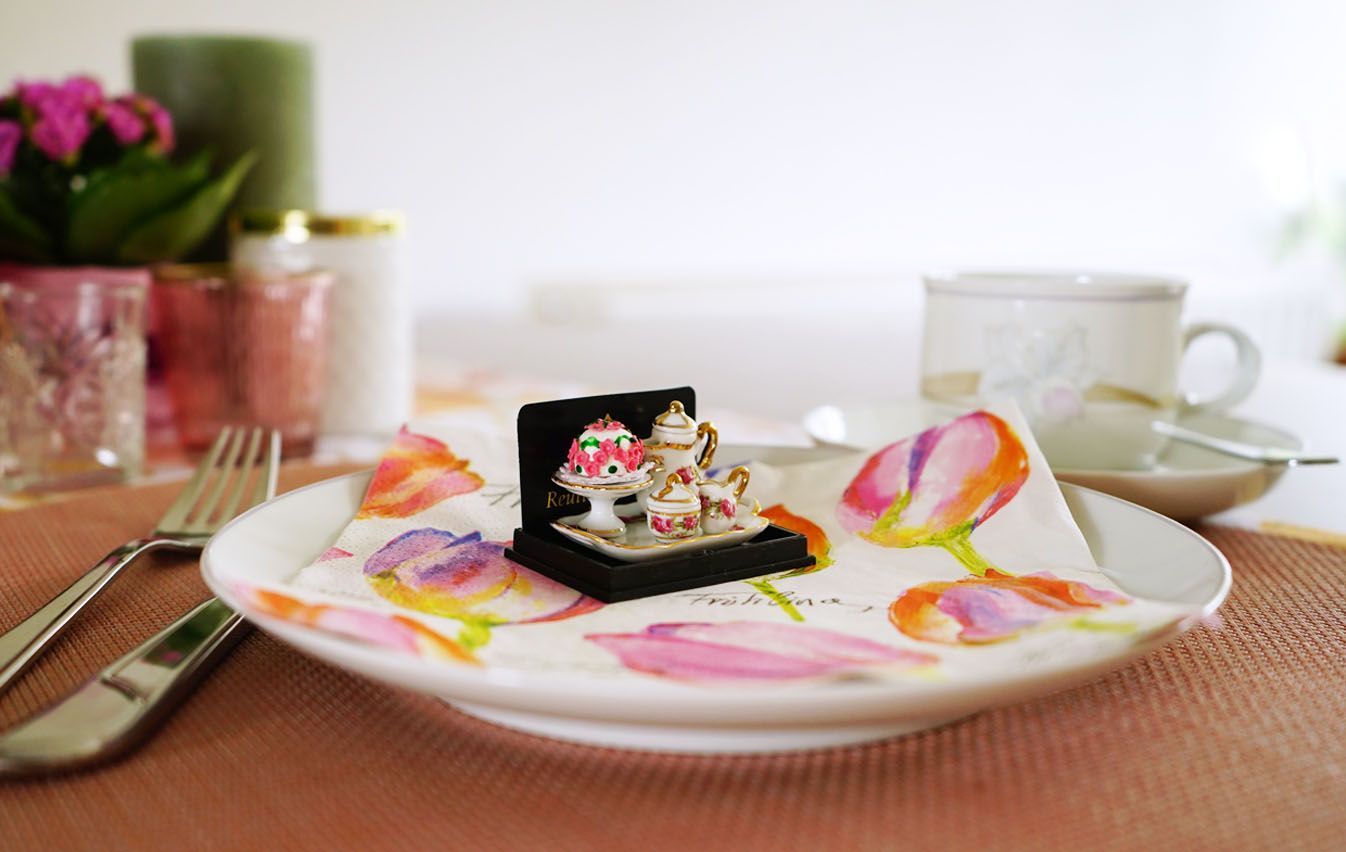
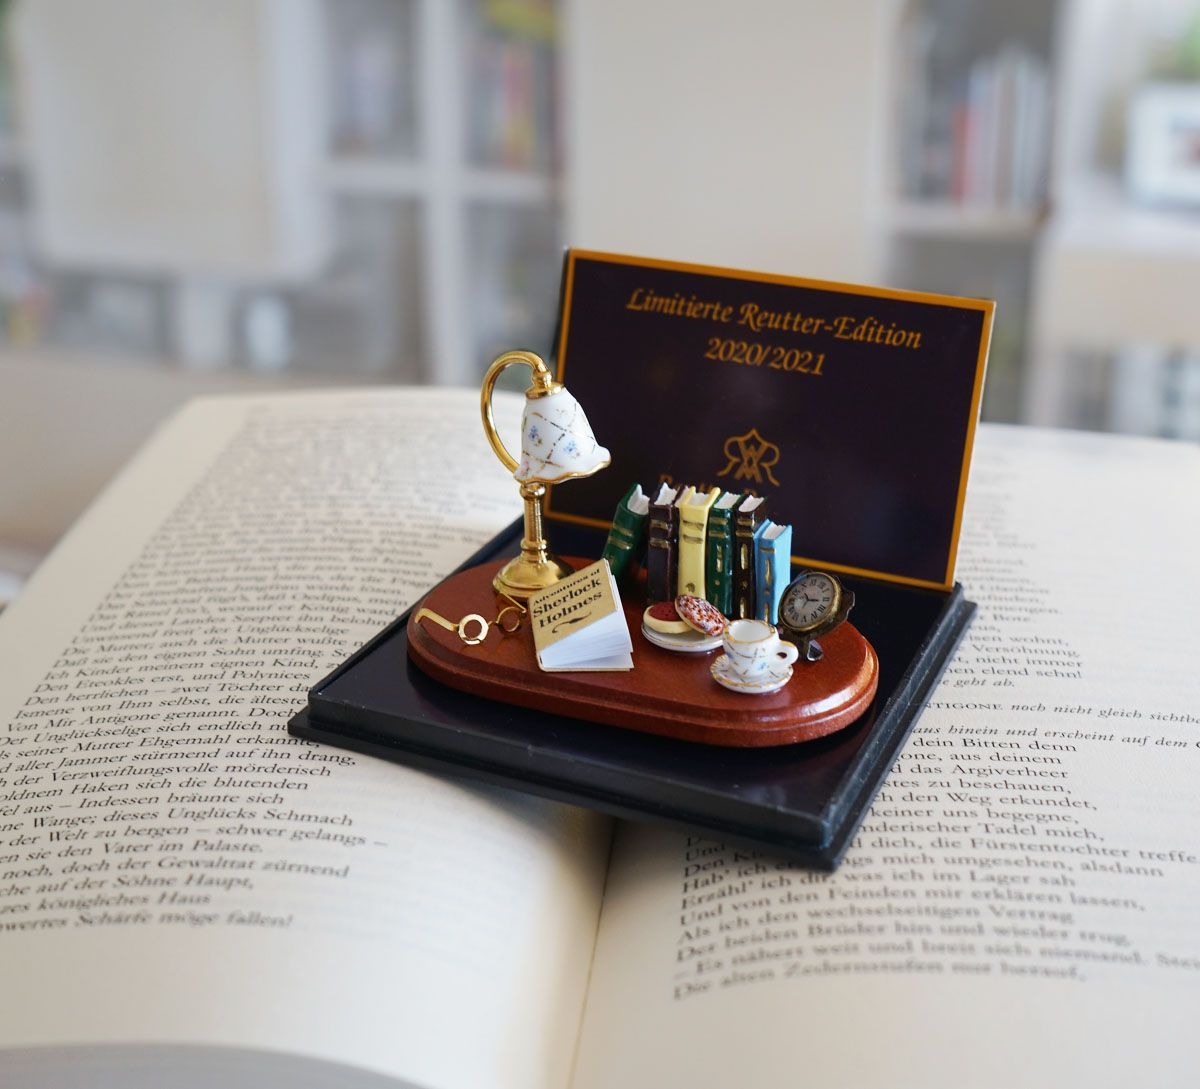
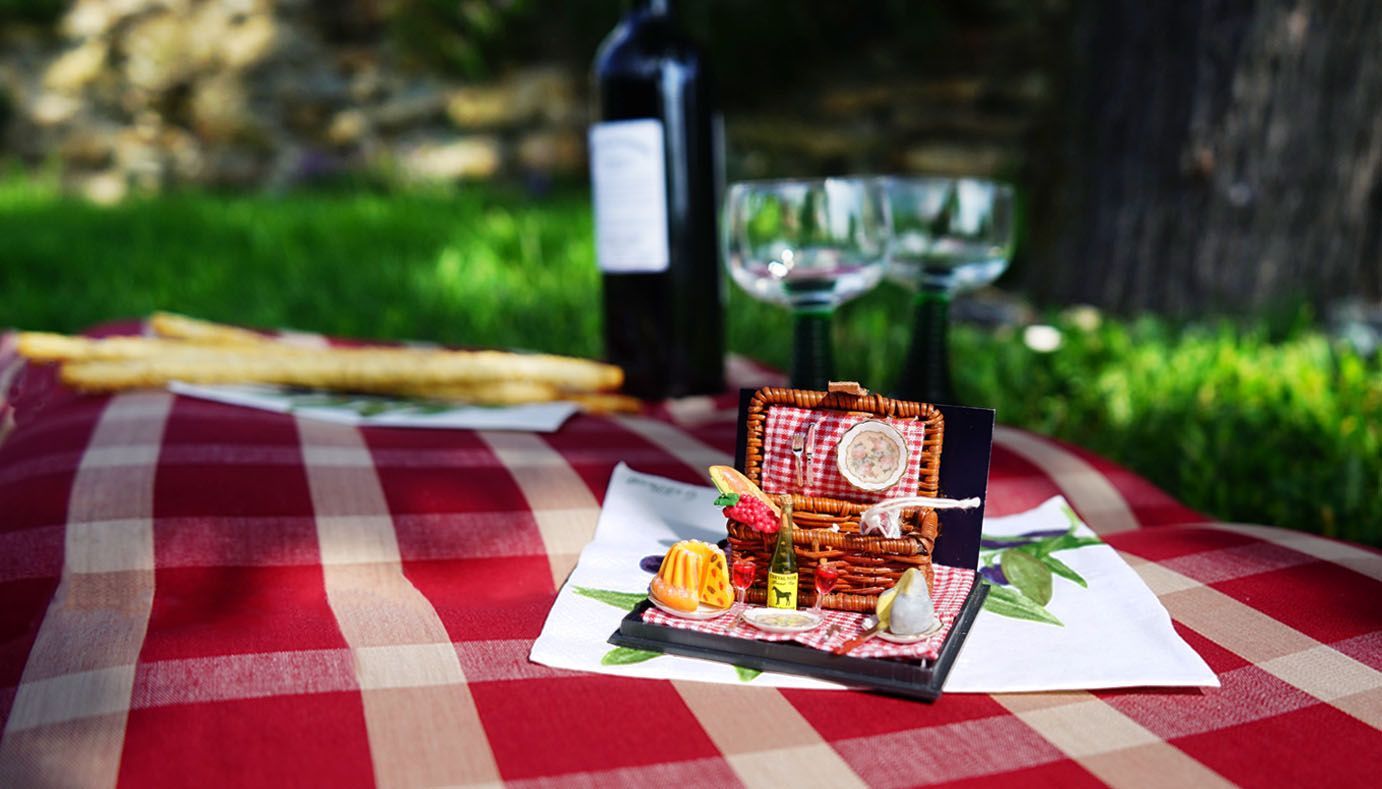
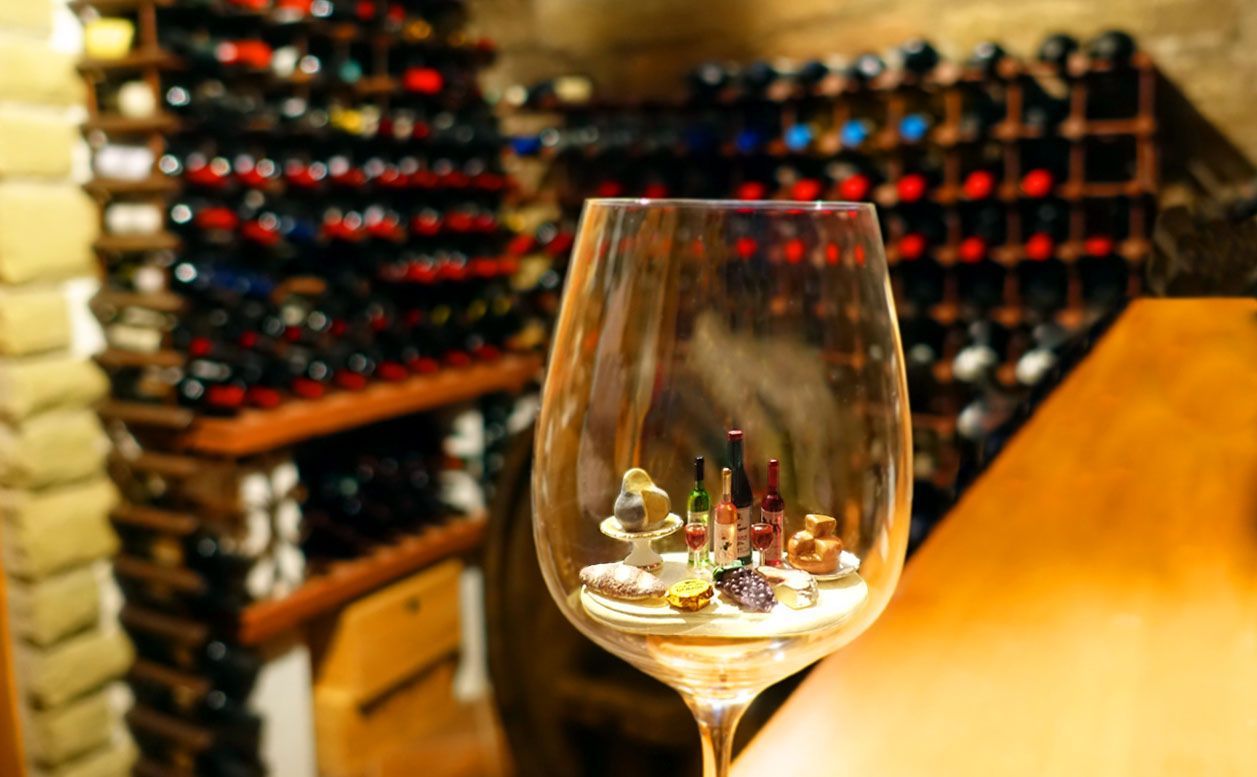
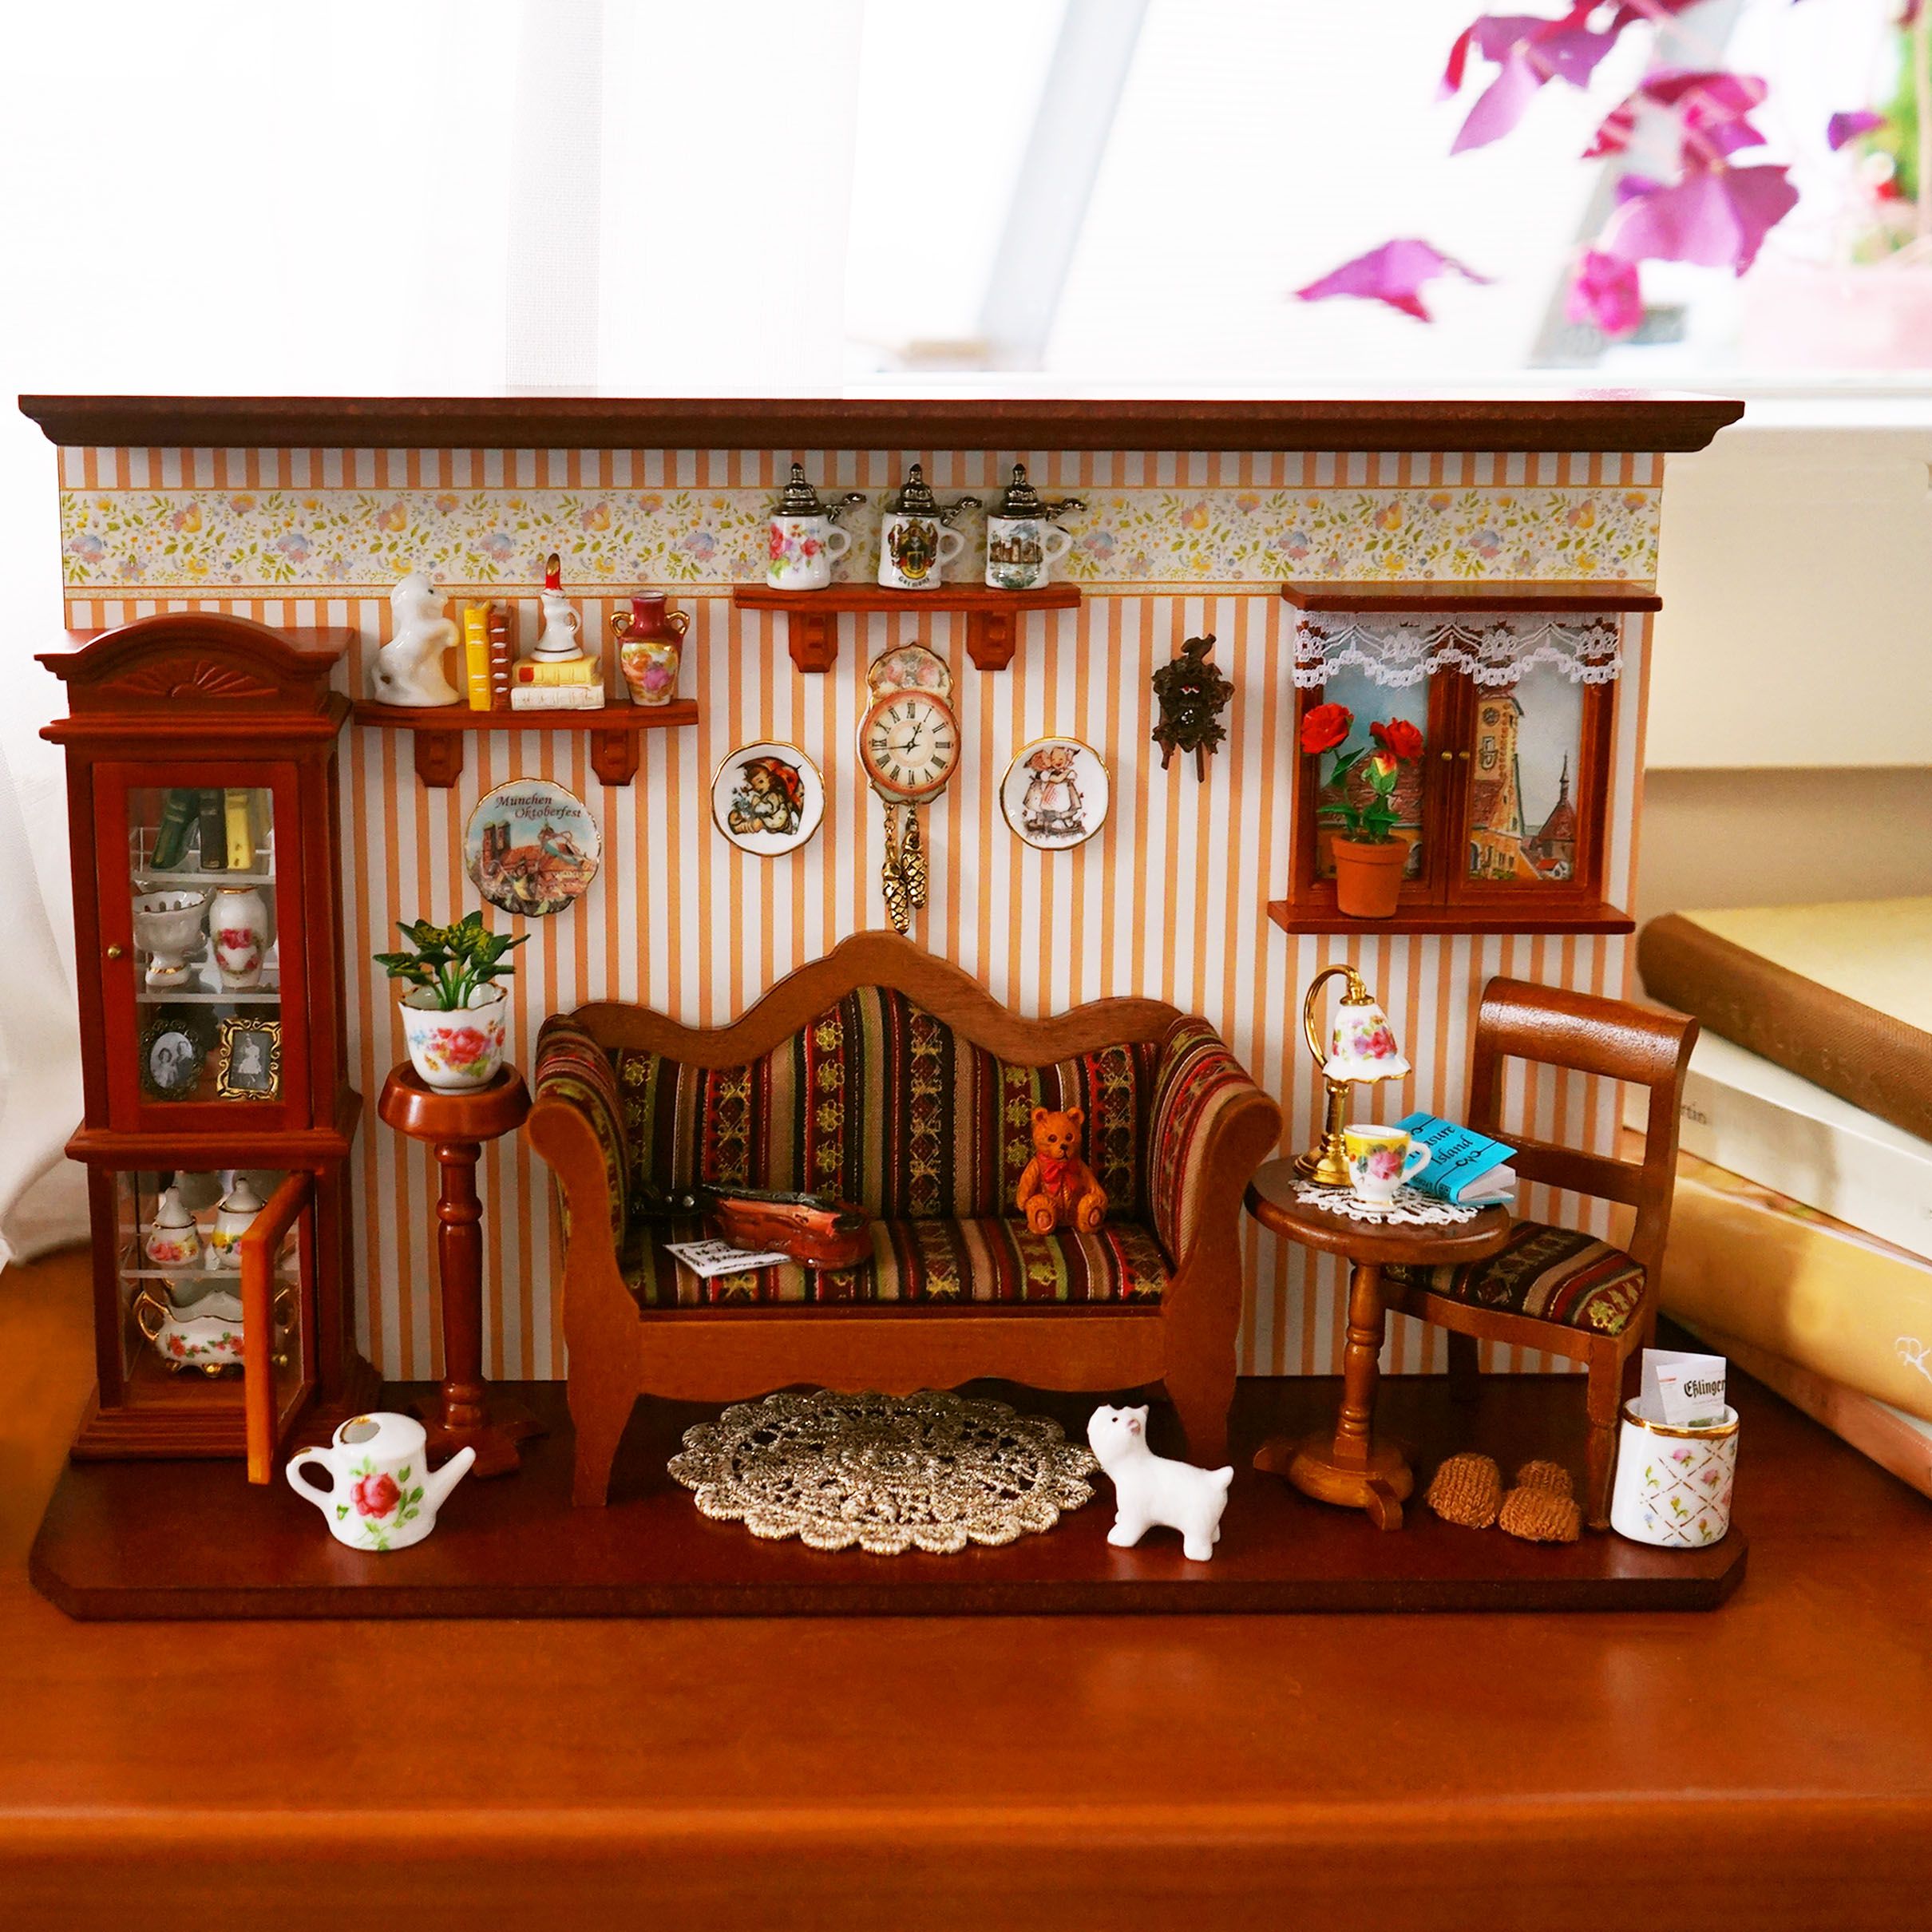
Finally, the biggest and one of the most exciting parts begins when the different miniatures in size 1:12 are combined together. Sometimes the finished combination consists miniatures out of up to 8 different materials. For example, they are assembled as miniature compositions, decorated pieces of furniture, or arranged into room boxes as harmonious scenes. This work requires a lot of experience, ideas for interior design and a steady hand to put this extremely small items together.
After a drying time, the items are checked again and carefully packed so that our little treasures reach you safely.
